How To Bind With Tape | Chest Binding Tutorial
When you think of binding, the first thing that comes to mind is usually binders. But what if I told you that's not the only option? In this article, we will show you how to bind with tape. We will also cover some of the common issues you may run into while binding with tape!
How To Bind With Tape
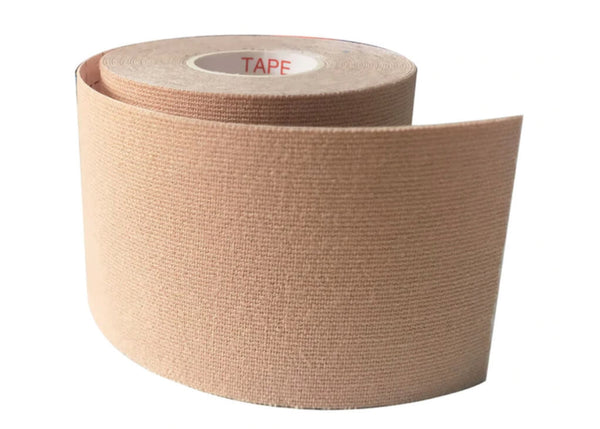
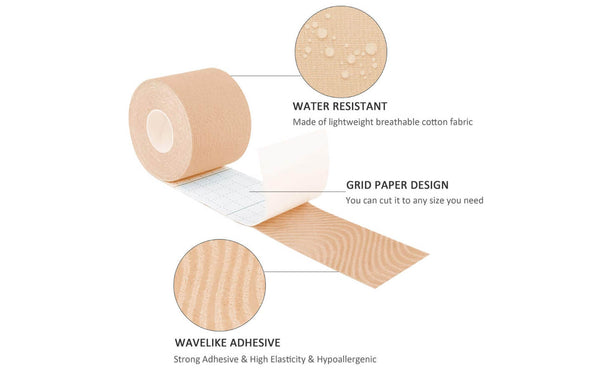
You might be saying to yourself now, "I thought it was unsafe to bind with duct tape!??" Well, that is definitely still true. Duct tape is very unsafe and should never be used for binding. However, we're not talking about duct tape here. We're talking about kinesiology tape. Kinesiology tape was designed to be worn on the body. It also moves when you move, so it doesn't restrict your range of motion. When done correctly, binding with kinesiology tape can be even safer than wearing a binder. When done improperly, however, you can end up hurting yourself pretty badly.
To prevent painful blisters skin tearing, you'll want to read this article start to finish and follow these guidelines closely. Once you get the hang of it, binding with tape just might change your life.
First Things First: Use a Test Strip
The first thing you are going to want to do is to try a test strip. A very small percentage of people find that they are allergic to the adhesive used in chest tape. If you are someone who has had reactions to band-aids, chest tape is likely not for you. Even if you haven't reacted to a band-aid before, we recommend that all new tapers use a test strip before taping.
To try a test strip, cut a small piece of tape off your roll and apply it to your chest area. You'll want to ensure the area is clean, dry, and free of lotions or oils. After cleaning the area, apply the test strip without any tension or pulling on your skin. Track the area for 24-48 hours. A small amount of itchiness and irritation is normal as your skin adjusts to taping. If you experience severe itching or other discomforts, remove the tape immediately. To prevent blistering, you will need to use oil to remove your tape. Skip down to Step 6 for instructions on proper removal.
Once you've determined that you are not allergic, you are ready to start your chest taping journey. Read on for our step by step guide.
Step 1: Prepare the Skin
To prepare your skin for taping, you'll want to be squeaky clean. Our favorite way to start a fresh tape job is by taking a nice hot shower with soap. Make sure the soap you use doesn't leave any residue behind. This means that fancy scrubs with oils are out. You really do want your skin to squeak.
Once out of the shower, you'll want to ensure that your skin is free of any oils, moisturizers, and deodorant. Oils of all sort will weaken the adhesive and sometimes prevent the tape from properly adhering to your skin.
If you're in a hurry and don't have time to take a shower, you can also use rubbing alcohol to prepare the skin. We don't recommend shaving, as shaving can cause skin irritation. However, you may need to trim your chest hair if you have a lot of it.
Step 2: Protect Your Nips
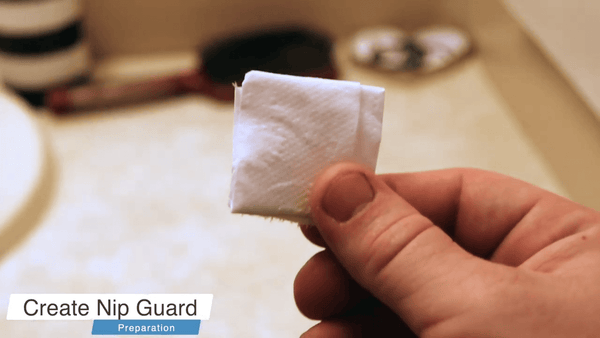
Next, you're going to want to make moves to protect your nipples and areola. TRUST - The last thing you want to experience is pulling adhesive off one of the most sensitive areas of your body. There are a variety of ways to create guards, like using gauze or toilet paper folded into squares or a large bandaid. You are essentially creating a barrier to be sure that the adhesive doesn't come into contact with your precious nips.
Step 3: Apply First Strip
Create a handle by folding the first half of the protective paper back and leaving half on the tape so that you don’t touch the sticky part. Push your chest tissue down and back with your hand as you apply the tape. Gently lay the first 2 inches of tape on your skin and lightly rub to activate the adhesive. Taking your time, line up your chest tissue so that it will all get tucked into the tape. Be sure that the tape lays as flat as possible without any wrinkles. Those ripples will cause your skin to become irritated over time and can affect your skin health.
Step 4: Apply Second Strip
If you are larger chested, you may need to apply a second strip on the same side to tuck in the remaining tissue so you don't have "dog ears". Take your second strip and prepare it like the first. Apply the second strip staggered from the first and overlapping to create flatness. Again, push the tissue out of the way with your hand and secure the tape. Note that often times, the tape will not stick to itself and will curl up if not attached to the skin properly.
Step 5: Secure Other Side
Repeat this process on the other side. Comfort is the goal. Make sure you can breathe and move comfortably, and if you cannot, something was done incorrectly. Be careful not to overstretch the tape when you apply it. Usually, the tape is already stretched on the paper backing, so an effective stretch can be achieved even when applying with zero-tension.
The tape should not be pulling the skin, just assisting it to stay in place. You should be “hiding” your chest COMFORTABLY on your body (such as under your armpit or down your torso) then using the tape to smooth out the appearance and secure it into place. Typically, the larger the area being taped, the less additional stretch is necessary during application.
Step 6: Removal
After 3-5 days, the edges of your tape might start to peel and wear after multiple showers and activities. This is usually when it's time to remove the tape and re-tape your chest. Most blistering and tissue damage occur with improper removal, so be sure to take this part of the process seriously. Start by rubbing the tape with oil. Any neutral kitchen oil is fine to use, but jojoba is best for your skin. Let the oil sit for 5-10 minutes, and then start removing the tape slowly.
Folks often choose to complete the removal process in the shower. You can apply the oil, get in, and start your normal showering routine. By the time you are ready to get out, you can begin to slowly remove the tape.
Got more questions about binding with Chest Tape? Check out our Chest Tape FAQ here.
Related Posts
TransTape / Chest Tape FAQs

Best Underworks Binder For FTMs | FTM Binding